Kitchen Layout Typologies in NYC: Residential & Commercial Design Guide
Introduction
A well-planned kitchen layout is crucial for functionality and efficiency, especially in space-challenged New York City. This guide explores kitchen layout typologies for both residential apartments and commercial kitchens. We’ll cover popular residential kitchen layouts (one-wall, galley, L-shaped, U-shaped, island, and peninsula) and key commercial kitchen design models (assembly line, island, zone-style, galley, and open kitchens). For each typology, we outline the pros and cons – from workflow and space efficiency to code considerations. We also discuss NYC-specific design factors like small apartment footprints, building code requirements, and health department regulations. Developers and property owners will find practical tips on choosing the right layout for their building type and tenants.
Residential Kitchen Layout Typologies
New York apartments range from cozy studios to spacious lofts, and the kitchen layout must maximize every inch. Six fundamental residential kitchen layouts are commonly used in multifamily buildings:
One-Wall Kitchen Layout (Single-Wall)
In a one-wall layout, all cabinets, appliances, and countertops line up along a single wall. This simple, space-saving layout is frequent in small NYC studios and micro-units. It creates a streamlined look and often opens up to the living area (many modern condos feature one-wall kitchens as part of an open floor plan). All plumbing, gas, and electrical run along one wall, which can reduce construction costs. One-wall kitchens under 80 sq. ft. are typically considered “kitchenettes” in NYC code, meaning they can rely on mechanical ventilation instead of a required window, but might need a small overhead soffit separation from living space per building regulations.
Pros:
- Requires only a minimal footprint, making it ideal for very small apartments.
- Cost-effective installation (services are concentrated on one wall).
- Creates an open, spacious feel when part of a living area.
- Easy to blend into open-concept layouts without enclosing walls.
Cons:
- Limited counter and storage space due to the single-wall configuration.
- Linear workflow (lacks the classic work triangle), which can be less efficient for cooking.
- Restricted appliance placement options – large fridges or ovens can crowd the line.
- Offers little separation between kitchen and living space (noise and odors may travel).
Galley Kitchen Layout
A galley kitchen consists of two parallel runs of counters and appliances with a walkway in between – essentially a corridor-style kitchen. Many older NYC apartments and brownstones have narrow galley kitchens tucked into small enclosed rooms. This layout is very space-efficient for cooking, offering decent counter length and storage relative to its footprint. In modern designs, a galley can also be open at one or both ends for pass-through traffic. However, galley kitchens over 80 sq. ft. must have a window by NYC code (to provide natural light and ventilation), and smaller galley kitchens without windows need mechanical venting.
Pros:
- Great for narrow spaces – maximizes use of a tight footprint.
- Efficient work triangle possible by placing sink, stove, fridge in close reach.
- Provides good counter space for its size and ample cabinet storage on two sides.
- Can offer a clear traffic flow down the center (especially if one end is open).
Cons:
- Can feel cramped with multiple cooks; limited room for more than one person.
- Minimal room for dining or socializing within the kitchen itself.
- Often lacks natural light (many NYC galley kitchens are interior rooms without windows).
- May be difficult to fit large or deep appliances while maintaining adequate walkway clearance.
L-Shaped Kitchen Layout
The L-shaped layout places countertops and appliances along two perpendicular walls, forming an “L” configuration. This is a highly adaptable layout found in many NYC apartments and condos, from small one-bedrooms to spacious lofts. An L-shaped kitchen fits well in open-plan living/dining areas and can often accommodate an island or a small dining table if space permits. It keeps the kitchen corner open on one side, which makes the space feel more connected to adjacent rooms – a popular feature in modern renovations (many developers remove walls to create L-shaped open kitchens in pre-war apartments).
Pros:
- Adaptable to different kitchen sizes, working in both compact and large spaces.
- Open layout with two sides allows good traffic flow and sightlines to living areas.
- Flexible for adding an island, peninsula, or breakfast table to increase prep space and seating.
- Supports an efficient work triangle between sink, stove, and refrigerator at the two ends of the L.
Cons:
- Limited continuous counter space in very small L-shaped kitchens (only two legs to work with).
- Corner cabinet access can be challenging (blind corners require special hardware like Lazy Susans).
- Offers less total storage and counter area compared to a U-shaped design of the same size.
- In a very large room, an L-shaped kitchen alone might feel under-defined or sprawling without an island to center it.
U-Shaped Kitchen Layout (Horseshoe)
A U-shaped kitchen uses three walls (or two walls plus a peninsula) of cabinetry and appliances, wrapping around the cook in a horseshoe configuration. This layout is common in larger apartments and suburban homes, but in NYC it’s often seen in spacious condos or where a former separate kitchen has an opening to the living room. The U-shape provides an abundance of counter space and storage, creating dedicated zones for cooking, prep, and cleaning. A well-designed U-kitchen supports an excellent workflow triangle and multiple people cooking together. NYC code classifies a U-shaped kitchen over 80 sq. ft. as a full kitchen (requiring a window for ventilation); if one end of the U is open to another room, a window on one of the walls usually suffices. Accessibility note: ensuring a 5-foot turning radius inside a U-shaped kitchen is important if the unit must be ADA-compliant (many new multifamily buildings in NYC need a percentage of units with accessible kitchens).
Pros:
- Ample cabinet storage and expansive counter area on three sides.
- Very efficient work triangle and short reach between appliances, reducing cooking time.
- Encloses the workspace, allowing multiple cooks to have separate stations (great for families or roommates).
- In larger kitchens, can even fit an island in the center for additional work and social space.
Cons:
- Can feel cramped or claustrophobic in a small room (aisle widths must be sufficient for comfort).
- If fully enclosed by three walls, it’s less social – the cook is separated from living/dining areas.
- Corner storage areas require design attention to be usable (otherwise dead space can occur).
- Entry points are limited – can create a one-way in/out situation, which might impede circulation if not planned well.
Island Kitchen Layout
An island is not a standalone layout by itself, but rather an addition to other layouts (L, U, or one-wall) that introduces a freestanding counter workspace in the center of the kitchen. Many upscale NYC apartments and penthouses feature island kitchens, where an island provides extra prep surface, storage cabinets, and often bar seating. Even some larger galley kitchens accommodate a narrow island if width allows. The island becomes a social focal point – guests can sit at stools, and the cook can face outwards, making it ideal for entertaining. In NYC, adding an island may require coordination with building services (for example, installing a sink or cooktop in an island means running plumbing or ventilation ducts under the floor, which condo boards and the Department of Buildings will review).
Pros:
- Provides extra workspace and storage, greatly increasing a kitchen’s functionality.
- Creates a central social hub for entertaining (guests can gather around the island).
- Flexible design – islands can be tailored in size/shape and include features like second sinks, wine fridges, or breakfast bar overhangs.
- In a large kitchen, an island improves workflow by shortening distances – it can form a second “triangle” or add symmetry that improves traffic flow.
Cons:
- Requires ample space; not feasible in very small apartments. Adequate clearance (usually 36–42 inches minimum) is needed on all sides of the island for safe movement.
- If poorly placed, an island can disrupt the work triangle or create bottlenecks.
- Potentially expensive to install – additional cabinetry, countertops, and any utilities (plumbing or gas lines, ventilation for an island cooktop) add cost.
- In some buildings, adding an island with fixtures may need special permission (to ensure no structural or plumbing issues, and compliance with code).
Peninsula Kitchen Layout (G-Shaped)
A peninsula layout is like an L-shaped or U-shaped kitchen that has a counter projecting out to form a partial fourth wall or “G” shape. Essentially, a peninsula is an island attached on one side. This layout is often used to get the benefits of an island in a space that can’t accommodate a fully freestanding island. In NYC apartments, a common renovation is to remove a wall and create a peninsula that separates the kitchen and living room – offering extra counter space and optional seating while maintaining openness. The peninsula can house a sink or cooktop or just be used for prep and dining. It also acts as a natural divider between the kitchen and adjacent living/dining area, which is useful in open-plan layouts.
Pros:
- Adds extra counter and cabinet space without requiring a larger kitchen footprint.
- Creates a partial room division, providing some separation of kitchen mess and living area while maintaining an open feel.
- Offers seating options similar to an island (bar stools along the outer edge), great for casual dining or entertaining.
- Ideal for medium-sized kitchens that can’t fit a full island – provides an island-like function in tighter spaces.
Cons:
- If not placed thoughtfully, the peninsula can create traffic flow issues (only one entry/exit point into the U or G-shaped kitchen).
- Can feel cramped in small spaces if the peninsula protrudes too far and narrows the passage.
- Less flexible than a true island – it’s fixed to the wall, so it can’t be accessed from all sides and may limit movement for one side of the kitchen.
- May block access to some cabinets or appliances if the swing of refrigerator or dishwasher doors isn’t considered in the design.
Commercial Kitchen Layout Models
Designing a commercial kitchen (for restaurants, cafes, or catering facilities) in NYC requires balancing efficiency, safety, and compliance with strict codes. Five primary commercial kitchen layout typologies are widely used, each suited to different restaurant operations:
Assembly Line Layout
An assembly line kitchen layout arranges work stations in a linear sequence, optimally suited for high-volume production of similar dishes. In a typical assembly configuration, food prep begins at one end and dishes progress through cooking steps in order, ending with final plating at the other end. This layout is common in quick-service restaurants and fast-casual eateries in NYC – think of a pizza kitchen or a sandwich shop where ingredients move along a line (e.g. the setup at chain restaurants like Chipotle or Sweetgreen). The line often includes a long central counter accessible from both sides, or a series of stations along a wall. NYC restaurants using an assembly line must still incorporate separate cleaning and storage areas off to the side or behind the line, as required by health codes (e.g. dishwashing sinks cannot be directly adjacent to food prep on the line).
Pros:
- Highly efficient workflow for repetitive tasks – ingredients flow seamlessly from prep to cook to service.
- Accommodates multiple cooks, each assigned to a specific task/station, which keeps production fast and consistent.
- Ideal for limited menus or build-to-order formats; supports very high output and quick service speed.
- Usually compact and linear, which can fit in narrow NYC storefronts or long, thin restaurant spaces. It makes the most of limited kitchen square footage.
Cons:
- Very specialized – works best for a specific menu and process. It’s inflexible if you need to cook many different cuisines or techniques in one kitchen.
- If one station gets backed up, it can bottleneck the whole line (the workflow is interdependent).
- Limited adaptability to new menu items or changes in process without reconfiguring the whole line.
- Can be tight on space for staff movement; also may lack a social element (often hidden behind a service counter, not designed for customer viewing unless it’s an open assembly like at a deli counter).
Island Layout
An island layout in a commercial kitchen features a central block (an “island”) in the middle of the kitchen where the main cooking equipment is concentrated. All the cooking ranges, ovens, grills, and fryers might be located on a large island at the center, while prep stations, storage, and cleaning areas are arranged around the perimeter of the room. This puts the chef and cooking activity literally at the heart of the kitchen. Many upscale restaurants or large teaching kitchens use this style because it encourages communication – the head chef can stand at the island and oversee all stations around.
For example, a hotel kitchen with space to spare might employ an island suite where multiple chefs work back-to-back in the center. In NYC, using an island layout means ensuring your space is big enough (real estate is at a premium, so this is mostly seen in larger venues). Adequate ventilation is a key consideration – a big island of cooking appliances will need a large overhead hood system, and NYC building code requires a dedicated exhaust duct to the roof for such hoods, which must be planned into the building’s design.
Pros:
- The cooking area becomes the visual and functional center of the kitchen, which can improve supervision and teamwork. Chefs can face each other and communicate across the island, enhancing coordination.
- Creates a circular or 360° workflow – staff can move around the island freely, which improves traffic flow and reduces congestion compared to corridors.
- The open central block is easier to clean (no tight corners), and having all cooking equipment in one place can simplify ventilation and fire suppression configurations (one big hood covering the island).
- Ideal for large kitchens with ample space – provides an impressive, open environment that can also double as an exhibition cooking area if visible to guests.
Cons:
- Requires a large footprint – not suitable for small kitchens. Sufficient aisle space around the island (at least 4 feet, preferably more) is needed by code for safety, which in NYC is a luxury only bigger establishments have.
- If the island layout isn’t well-planned, staff might have to walk farther to reach peripheral prep or storage areas, potentially slowing down service. It works best when peripheral zones are logically arranged around the island.
- Installation and equipment costs can be high – a custom island suite and large hood system are expensive. Additionally, floor reinforcement may be needed for heavy central equipment.
- Not efficient for kitchens with limited staff; if only one or two cooks are on duty (as in a small cafe), a central island might be overkill and distance them from refrigerators or sinks along the walls.
Zone-Style Layout (Sectional)
A zone-style commercial kitchen is organized into separate blocks or stations based on function or menu section. Instead of one line, the kitchen is divided into zones such as a prep zone, a grilling/cooking zone, a baking zone, a cold salad/dessert zone, and a dishwashing zone, etc. Each zone contains all the tools and equipment for its specific task and can operate semi-independently. This layout is typical in larger restaurants, hotels, or catering facilities that handle diverse menus – essentially following the classic brigade system (with stations like sauté, grill, pastry, etc.).
In NYC, a zone layout is practical for high-volume kitchens or multi-kitchen facilities (like food halls or commissary kitchens) because it allows different teams to work in parallel. However, it requires enough space to carve out distinct areas, which can be challenging in smaller Manhattan restaurants. From a code perspective, a zoned kitchen must still maintain proper separation of raw and cooked foods and provide required hand sinks in each prep area. The NYC health department will check that each zone (especially ones handling raw meats or bakery) meets sanitation standards and that the overall layout prevents cross-contamination.
Pros:
- Enables specialization: each staff member or team focuses on their own area of expertise without interfering with others, improving productivity and quality for complex operations.
- Multiple types of dishes can be prepared simultaneously in different zones – great for diverse and extensive menus (e.g. a hotel kitchen can produce banquets, room service, and restaurant meals at once in different zones).
- Leaves a wider open central space (if zones are at the periphery), improving overall movement and allowing bulk storage or carts to be placed in the middle for access.
- Highly organized and scalable – easy to add a new station or expand a zone if the menu grows, as long as space permits. Ghost kitchens and large catering companies often use a zone approach to handle volume efficiently.
Cons:
- Not efficient for small kitchens – dividing a tiny kitchen into zones could waste space and reduce the ability to multitask. In NYC’s smaller restaurant spaces, a zone layout might not be feasible.
- Requires more staff to operate effectively (each zone needs personnel); in a low-staff scenario, having separate zones could result in underutilized areas.
- Communication between stations becomes critical – without a linear flow, clear coordination is needed to ensure dishes from different zones are ready together.
- Can be harder to supervise from one point; executive chefs may need to move around a lot or have sub-chefs managing each section, which is typical in big operations but adds management complexity.
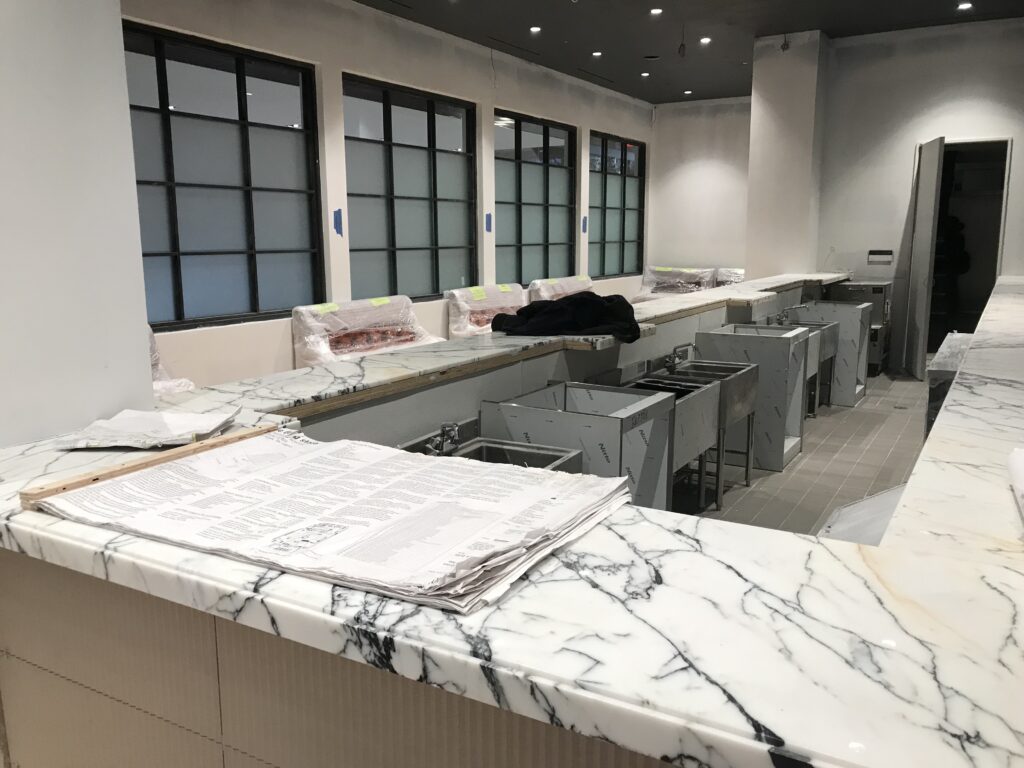
Galley Layout (Commercial)
A commercial galley kitchen layout is similar to the residential galley concept, but on a bigger scale. All stations, counters, and equipment line the perimeter walls of a kitchen, often on two facing walls, creating a central aisle for movement. This is commonly used in tight kitchen spaces – food trucks, small restaurant kitchens, or long, narrow footprints (many NYC restaurant spaces are in older buildings with long, skinny back-of-house areas, perfect for a galley setup). The galley layout makes efficient use of limited width, placing everything within quick reach of a central aisle. It’s essentially a compact “corridor” kitchen for commercial use, and many mom-and-pop restaurants or diners in NYC have this arrangement. One wall might have the cooking line (ranges, grills, fryers) and the opposite wall has prep tables, coolers, and the sink/dishwasher, for example. This way, staff can pivot between opposite stations without walking far.
Pros:
- Maximizes use of small or narrow kitchen spaces – a lifesaver in NYC where back-of-house areas can be very tight.
- All equipment and counters are against walls, leaving the center open for quick movement and a supply corridor. In a larger galley kitchen, this open center allows staff to rotate easily from one task to another.
- Efficient for a limited number of staff; in a small operation, one or two cooks can handle multiple stations by simply turning around, which is ideal for food trucks or tiny cafe kitchens.
- Simplifies utility and ventilation layout by having equipment along walls – easier to run plumbing lines and install ventilation ducts along the length of the kitchen (often venting through a rear wall or straight up from the line).
Cons:
- Still space-constrained: can become crowded if you try to fit too many stations. More than a few staff working simultaneously might bump into each other in the narrow aisle.
- Limited menu capability – a galley kitchen best serves a focused menu or simpler operation. Trying to do extensive prep and cooking in a very tight galley may overwhelm the space.
- If one wall is fully cooking and the opposite is dishwashing, heat and steam can make the narrow aisle uncomfortable; proper ventilation is critical to meet code and maintain a safe environment.
- For larger kitchens that use a galley style (essentially a ring around the room), there’s an empty middle area which could feel like wasted space – you must ensure that open area is needed for circulation or flexibility.
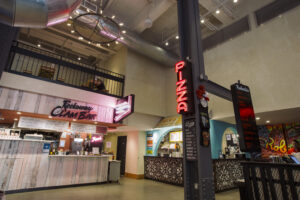
Open Kitchen Layout (Display Kitchen)
An open kitchen layout in a commercial setting means the kitchen is openly visible to diners, typically sharing the same space or separated only by a low partition or glass. In terms of arrangement, an open kitchen can be combined with any of the above models (assembly, island, etc.), but its defining feature is that patrons can see the action. Many modern NYC restaurants, especially high-end or trendy spots, opt for open kitchens to create an interactive dining experience.
For example, a sushi bar or a chef’s counter arrangement is an open kitchen where guests sit around the prep area. Another example is a pizzeria with the oven in plain view, or a fine dining restaurant where you can watch the chefs plating dishes. Designing an open kitchen in NYC requires extra attention to code: the health department will scrutinize cleanliness since everything is on display, and the building code may require additional ventilation to ensure cooking odors and smoke don’t infiltrate the dining area (powerful exhaust hoods and air filtration are a must). Fire safety is also crucial – hot equipment should be strategically placed away from customer areas, sometimes with a glass partition if needed for protection while still allowing views.
Pros:
- Customer engagement and entertainment – diners enjoy watching their food being prepared, which can enhance their perception of quality and make the meal memorable. (Open kitchens have been noted to increase customer satisfaction and even speed of service in some studies.)
- Makes the overall space feel larger and more connected – an open kitchen eliminates walls, often making a small restaurant feel more spacious and lively.
- Encourages high standards of cleanliness and organization, as everything is visible. This transparency can build trust with guests regarding hygiene and food quality.
- Chefs and patrons can interact directly in some formats (like chef’s tables or omakase counters), creating a unique dining experience that can justify premium pricing.
Cons:
- Noise and odors from the kitchen are shared with the dining room – without proper acoustic design and ventilation, an open kitchen can lead to a noisy environment or unwanted cooking smells where people eat.
- Requires meticulous design and maintenance: all surfaces and equipment must be kept immaculate since diners have a full view. There’s no hiding a messy station during a rush, so staff must be trained to work neatly under pressure.
- Can be distracting or uncomfortable for guests if not executed well – for instance, intense heat or occasional flames from a grill might worry diners, so safety measures and clear separation (even invisible, like airflow barriers) should be in place.
- More stringent code requirements might apply. For example, NYC DOB mandates robust ventilation and fire suppression for open kitchens; the restaurant may need a sprinkler system and grease traps that are integrated in a way that doesn’t disrupt the customer-facing aesthetics. Additionally, any gas cooking appliances in an open kitchen must still have the same hood and duct requirements, which can be a challenge to blend into the front-of-house design.
Conclusion
Kitchen layout typologies – whether for a cozy Manhattan studio or a bustling restaurant kitchen – form the backbone of a functional design. In NYC, where space is at a premium and regulations are rigorous, choosing the right layout type is especially important. From the simplicity of a one-wall apartment kitchen to the orchestrated zones of a commercial kitchen, each typology comes with distinct advantages and trade-offs. By understanding these, developers and property owners can make informed design decisions that enhance usability, ensure safety, and maximize property value. Remember to factor in New York-specific constraints like small footprints, ventilation rules, and health codes during planning. The investment in a smart kitchen layout pays off in smoother operations, happier occupants, and easier maintenance in the long run.
Ready to optimize your kitchen design for your next NYC project? Contact Parkbench Architects today for expert guidance on residential and commercial kitchen planning. We have the local code knowledge and design experience to create a kitchen layout that meets your needs and exceeds your expectations – from blueprint to final build, we’re here to help bring your vision to life.